
Accessing the Contacts Module
-
Navigate to the MCP module.
-
From the MCP Menu, click Contacts.
Option 1: Adding Contacts by Upload
To upload a list of contacts:
-
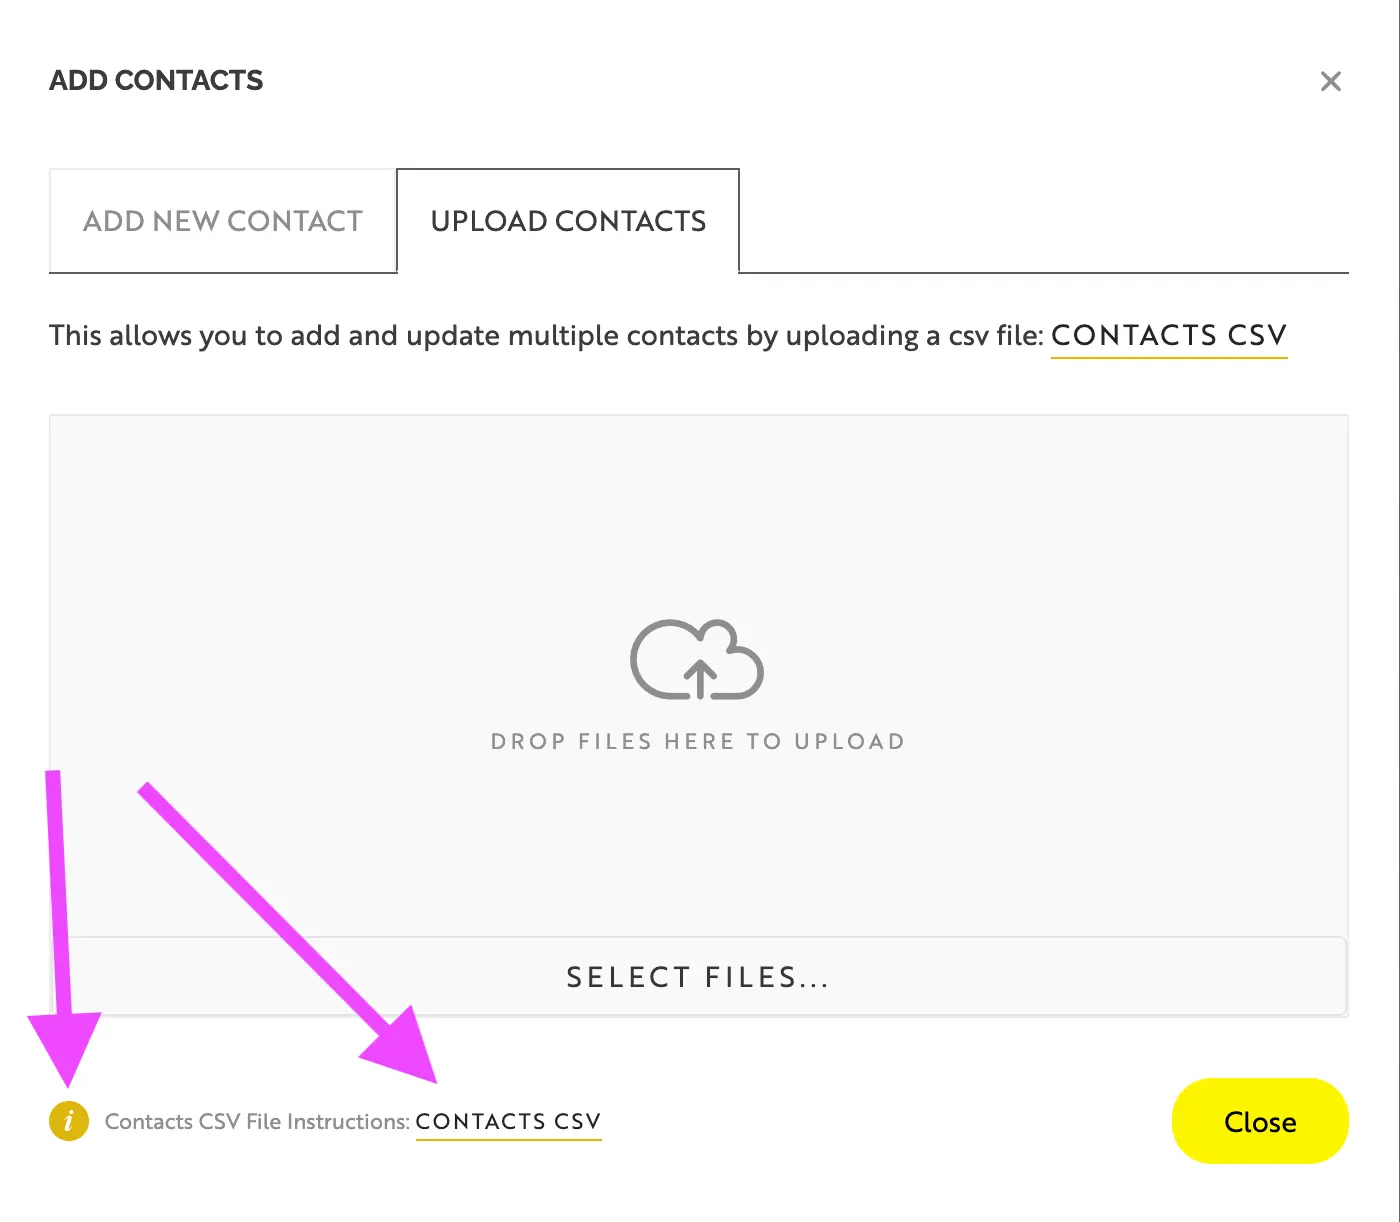
Click the Add Contacts button.
-
Select the Upload Contacts tab.
-
At the bottom of the screen, click the Contacts CSV File link to download the sample file format.
-
Once your contact list is properly formatted and ready, drag and drop the file or click to select the file for upload.
Important: Be sure to format your list exactly as shown in the sample file before uploading.
Tip: Use the Groups Column
-
While the Groups column is not required, it is highly recommended.
-
Groups act as your email distribution list names.
-
Examples:
-
"7th Grade Parents" -
"Annual Fund 2026 Invitation"
-
Option 2: Adding a Contact Manually
If you need to enter a contact individually:
-
Click the Add Contacts button.
-
Fill in the required fields for the contact.
-
Save the entry.
Discover more


ONGOING SUPPORT
Need help with anything else?
If you can’t find the answer you’re looking for in our Knowledge Base, there are three ways you can get support: